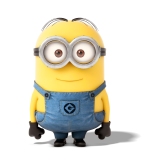
We thought it would be fun to teach you guys how to paint this adorable minion pumpkin! Minions are so popular right now, everyone loves them! How could you not? Plus, carving pumpkins is difficult, messy, and they start to rot right away. Painted pumpkins last much longer and look just as cute!
Let’s start off with the supplies!
What you need:
1. A pumpkin, could be a fresh pumpkin or a plastic one, they sell different shapes and sizes at craft stores. I found them at Michaels for under $8, these are great because they can be saved for the following year.
2. Acrylic Paint (a large yellow and/or purple, blue, black, and white, plus silver if you are making the purple minion)
3. Black & Silver Pipe Cleaners, silver is optional
4. 3″ googly eyes
5. Mason Jar Lids, they come screwed onto the mason jar but when you unscrew them the middle of the lid pops out
6. Black Craft foam
7. Purple Boa (for the purple minion only)
8. Hot glue gun and some glue stick
9. White Paper
10. Scissors
11. Toothpick
12. Paint brushes
**For all my visual people, here are some of the things to look for at the craft store!
Let’s begin!
Step 1:
Cover the entire pumpkin with the yellow or purple paint, depending on which minion you are trying to make. Let it set, apply a second coat if needed.
Step 2:
Paint the bottom third in blue for the yellow minion and black for the purple minion, then paint the overall straps along the sides.
Step 3:
While the paint is drying, begin cutting the foam for the goggle strap, you can paint this on but I like the polished look of the foam, cut it about an inch thick and as long as you need to wrap around your pumpkin. You can also take this time to cut the pipe cleaners to the desired length for the hair.
Step 4:
For the eyes you will need to cut your white paper to the size of the mason jar lids, glue the googly eyes to the paper and then glue the edges of the paper to the inside of the mason jar lid. You can make one or two, minions come with both!
Step 5:
Once the overalls are dry, go in with a small paint brush and add the details in white or silver, i.e. the stitching, the buttons, the emblem, etc.
Step 6:
Carefully with your hot glue gun wrap the foam around the pumpkin. Don’t cover the whole thing with glue at once because hot glue dries relatively quick. Begin by placing a dab of glue on the front and putting down the foam and slowly working your way around. Starting at the front is great because you will be able to cover the ends with the eye, which you can glue on at this point as well! If you want to add the silver pipe cleaners around the eyes you can do that now.
Step 7:
Now that we have the eyes and overalls on we can find the perfect spot for the mouth, Paint on a smile and some teeth, don’t be afraid to make mistakes! The paint will be easy to wipe off while it is still wet. If you are really worried about your skills as an artist choose a simple minion face to work with. I have included some photos at the end of this post with different ideas.
Step 8:
The last step is to add the hair, for the pipe cleaners poke holes along the top of the pumpkin with toothpicks and insert the pipe clean, don’t poke a bigger hole because you want the pipe cleaner to fit very snug in the hole. For the purple minion cut the boa in a few pieces and hot glue the ends to the top, there is no need to glue the entire piece, just the top of it will be enough.
The last step is to display your pumpkins on the porch and let everyone admire them! This is a super fun project to do with your kids, each minion will look a little different and they will look great once displayed together! Below are a few more pictures to spark your creativity!
Hope you all enjoyed this post! Check us out on Facebook to share this post with all your friends or pin it on Pinterest for all your followers!


